 Heated mirrors are standard in higher-class cars. Almost every car, which has electric mirror adjustment, it has also mounted on their surface (on the inside) special heating mats. These mats come on simultaneously with the heated rear window. It is a very convenient solution, to get rid of ice quickly and efficiently, snow and water from the mirror surface. Today we suggest, As an identical device, you can install it yourself in virtually any car. In addition, the entire installation is inexpensive and can be completed in one afternoon.
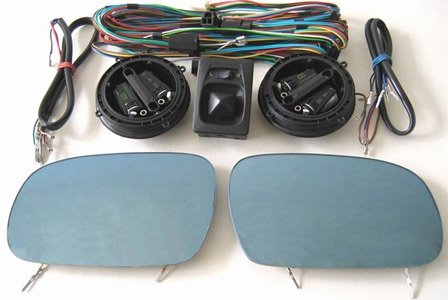
The above-mentioned heating mat is nothing else than applied with a sieveprinting a special retaining element on a flexible self-adhesive substrate, which after connecting the voltage to it, conducting electricity, begins to give off heat.
For our conversion, we chose one of the two basic sizes of the mat (small ones are designed for cars the size of Fiesta, Cineuecento, large for most passenger cars). Of course, you can order virtually any shape and size of the mat, adapting it to specific mirrors. It is an interesting solution for owners of large vans, off-road or delivery vans, for which the size of the mat presented here may be too small. However, a typical one is enough for most passenger car mirrors, standard size.
The mat is supplied with voltage from 12 do 14 volts and consumes approx 15 watts of power. During heating, it can reach a maximum temperature of approx 60 degrees Celsius.
Assembly should generally not be too problematic. However, it requires some manual skills and patience. Of course, the mat is glued on the inside of the mirror.
To do this, we need to peel off the glass from the plastic frame, in which it is inserted (in mirrors mounted rigidly to the housing, they must be removed from the frame). To help myself, it is worth using a small knife (or scalpel) and electric dryer, to heat the connection.
When we do that, let's remember, to thoroughly remove any adhesive residue, both glass itself, and a plastic frame.
Apply a heating mat to the cleaned and degreased inner surface of the mirror. Its electrical terminals should be as close as possible to the door – it will be easier for us to connect it to the cables this way. Let us be careful at the same time, that the cables do not block the mirror adjustment mechanism or rub against sharp edges. We must glue everything back into the plastic frame.
For the mats to work, they must be supplied with voltage from the vehicle's electrical system. Pull the power cables between the mirror housing, doors and door pillars to the instrument panel. On older vehicles, to route the cables, it will be necessary to drill holes in the door posts and in the side of the door (remember about the anti-corrosion protection after drilling the holes and protect their edges with a rubber grommet). In newer cars, in which the electrical cables are already routed in a corrugated rubber sheath (the so-called. Peszelku), you just need to add two new cables to power the mirror mat.
Now it's time to connect the heaters to the appropriate power cables. There are three solutions: first, it is a direct connection to the cable that supplies voltage to the rear window heating, the second, this is the connection right behind the electric switch of the heating, third, clip at the rear window heating relay.
Let's remember, that all connections are well made (with soldering or connectors) and properly insulated, that there is no short circuit. The cables connected to the plastic mirror housing are also connected to the heating mat by means of connectors.
Heated mirrors
Visited 491 times, 1 visit(s) today